
AI agents are no longer just a future idea. Many businesses are already using them to reduce manual work, improve customer response times, and make internal processes easier.
The challenge is not whether AI agents are useful. It is knowing how to build one properly.
That is where Microsoft Copilot Studio stands out.
For businesses already using Microsoft tools, it makes it possible to build practical AI agents without starting from scratch or relying on a full development team.
This guide shows exactly how to build an AI agent in Copilot Studio, what to click, what to configure, and what to watch out for if you want it to work in the real world.
What You’ll Learn in This Tutorial?
This step-by-step tutorial shows you how to create an AI agent in Microsoft Copilot Studio from scratch. You’ll learn how to:
- Set up your first agent in Copilot Studio
- Connect knowledge sources like SharePoint and PDFs
- Create conversation topics and workflows
- Test and refine agent responses
- Publish your agent to Microsoft Teams or internal portals
- Monitor performance and improve over time
No coding experience required. This 2026 tutorial is designed for business users, IT teams, and anyone new to building AI agents.
What Is Microsoft Copilot Studio?
Microsoft Copilot Studio is Microsoft’s platform for creating AI agents that can answer questions, automate tasks, and connect to business systems.
It works across:
- Microsoft Teams
- websites
- internal portals
- business apps
Unlike traditional chatbot tools, Copilot Studio can:
- understand natural language
- pull information from business data
- trigger workflows
- connect to systems like CRM, HR, or finance platforms
Microsoft Copilot Studio is designed specifically for this. For businesses already using Microsoft tools, it removes much of the complexity typically associated with building AI agents, with no custom development, no disconnected platforms, and no steep learning curve.

How to Create an AI Agent in Copilot Studio?
To build an AI agent in Microsoft Copilot Studio, start with a clear business use case, create the agent inside Copilot Studio, connect trusted data sources, design conversation actions and workflows, then test and publish it safely.
That process sounds simple, but the quality of the setup makes the difference between a useful agent and one people stop using after a week.
Step-by-Step: How to Build an AI Agent in Copilot Studio?

Step 1: Choose One Clear Use Case for Your Agent
Before opening the platform, decide what your AI agent should actually do.
The biggest mistake businesses make is trying to make the agent do everything.
Start with one clear pain point:
- answering HR policy questions
- handling IT support requests
- helping users find documents
- automating internal approvals
The best first use cases are:
- repetitive
- high-volume
- rules-based
For example, an HR agent that answers leave policy questions and links users to forms is much easier to launch than a fully automated employee service desk.
The goal is to prove value quickly.
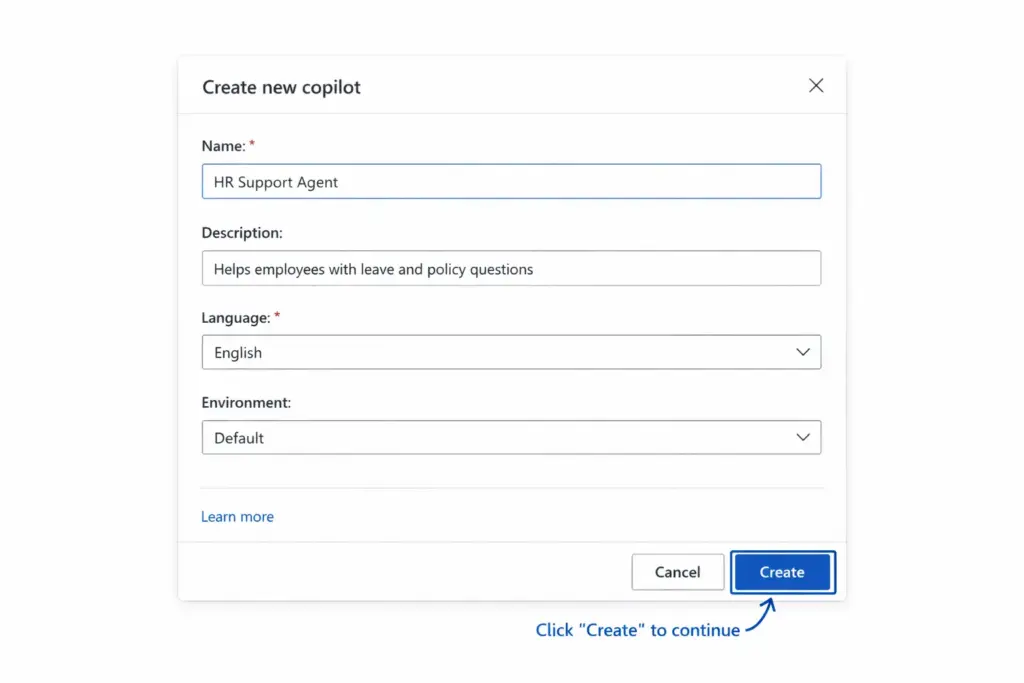
Step 2: Create Your First Agent in Copilot Studio
Go to Microsoft Copilot Studio and sign in with your Microsoft account.
From the left-hand menu:
Home → Create → New Copilot
You will then:
- choose a name
- add a short description
- choose the default language
- select the environment
For example:
- Name: HR Support Agent
- Description: Helps employees with leave, payroll and policy questions
Once created, Copilot Studio opens the main agent workspace.
This is where you will manage:
- topics
- knowledge sources
- actions
- channels
- analytics
At this point, do not overcomplicate it. Focus on getting a usable first version live.
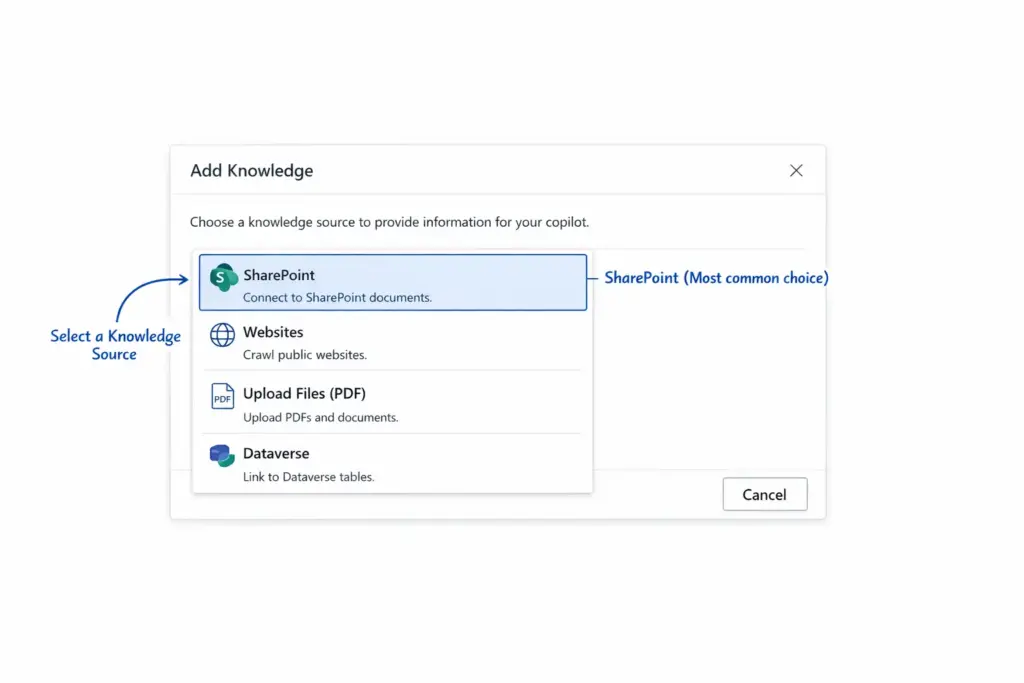
Step 3: Add Knowledge Sources to Your Agent
This is one of the most important steps.
Your agent is only as useful as the information it can access.
In Copilot Studio:
Knowledge → Add Knowledge
You can connect:
- SharePoint document libraries
- websites
- PDFs
- internal knowledge bases
- Dataverse data
For example:
- HR policy PDFs
- employee handbook pages
- IT troubleshooting articles
Best practice:
- use clean, up-to-date content
- remove duplicates
- avoid messy documents
Poor source data leads to weak answers.
For businesses using:
- Microsoft SharePoint
- Microsoft Dataverse
this step is usually quick.
Step 4: Create Topics and Actions
Now define how the agent behaves.
In Copilot Studio:
Topics → Create topic
Topics are conversation paths.
For example:
- password reset help
- leave request process
- order tracking
You can:
- write trigger phrases
- set follow-up questions
- create branching logic
Then add actions.
Go to:
Actions → Add Action
This lets your agent:
- trigger a Microsoft Power Automate flow
- create tickets
- update records
- send alerts
Example:
If a user says:
“I need a laptop reset”
The agent can:
- verify user details
- create an IT support ticket
- send a confirmation in Teams
This is where Copilot Studio becomes more than a chatbot.
It becomes a business process tool.

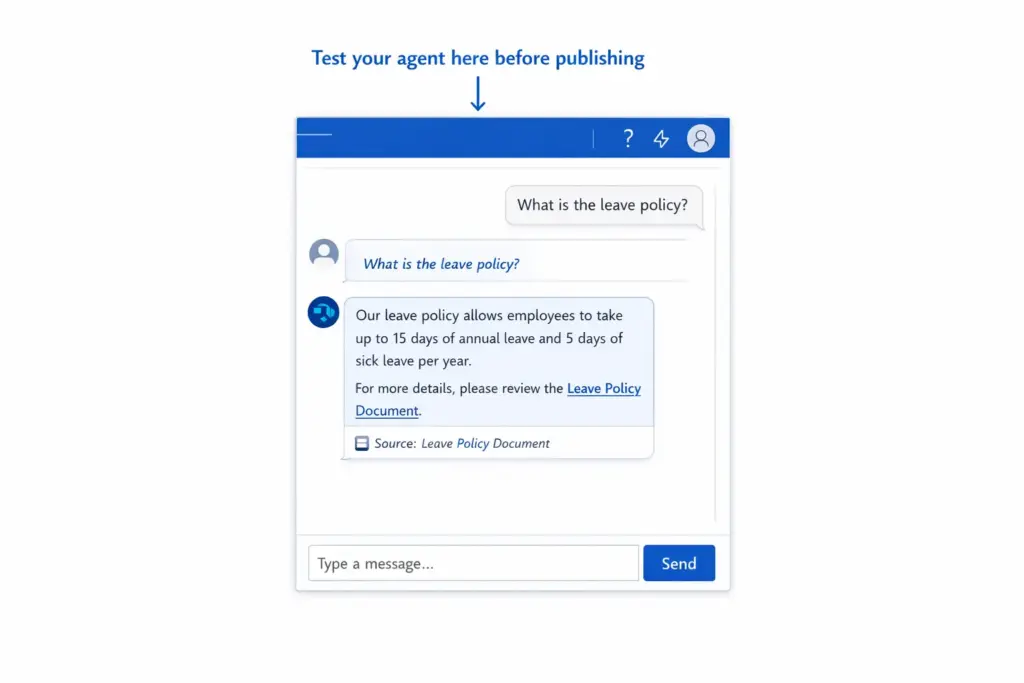
Step 5: Test Your Agent Before Publishing
Testing is where most businesses either build trust or create frustration.
Use the built-in test pane in Copilot Studio.
Test:
- common questions
- unclear wording
- edge cases
- failed responses
Check:
- response quality
- workflow triggers
- fallback handling
Things to look for:
- Does it give vague answers?
- Does it fail when wording changes?
- Does it hand off to humans properly?
This stage matters because users lose confidence quickly if the first experience is poor.
Refine prompts, actions, and source content before rollout.
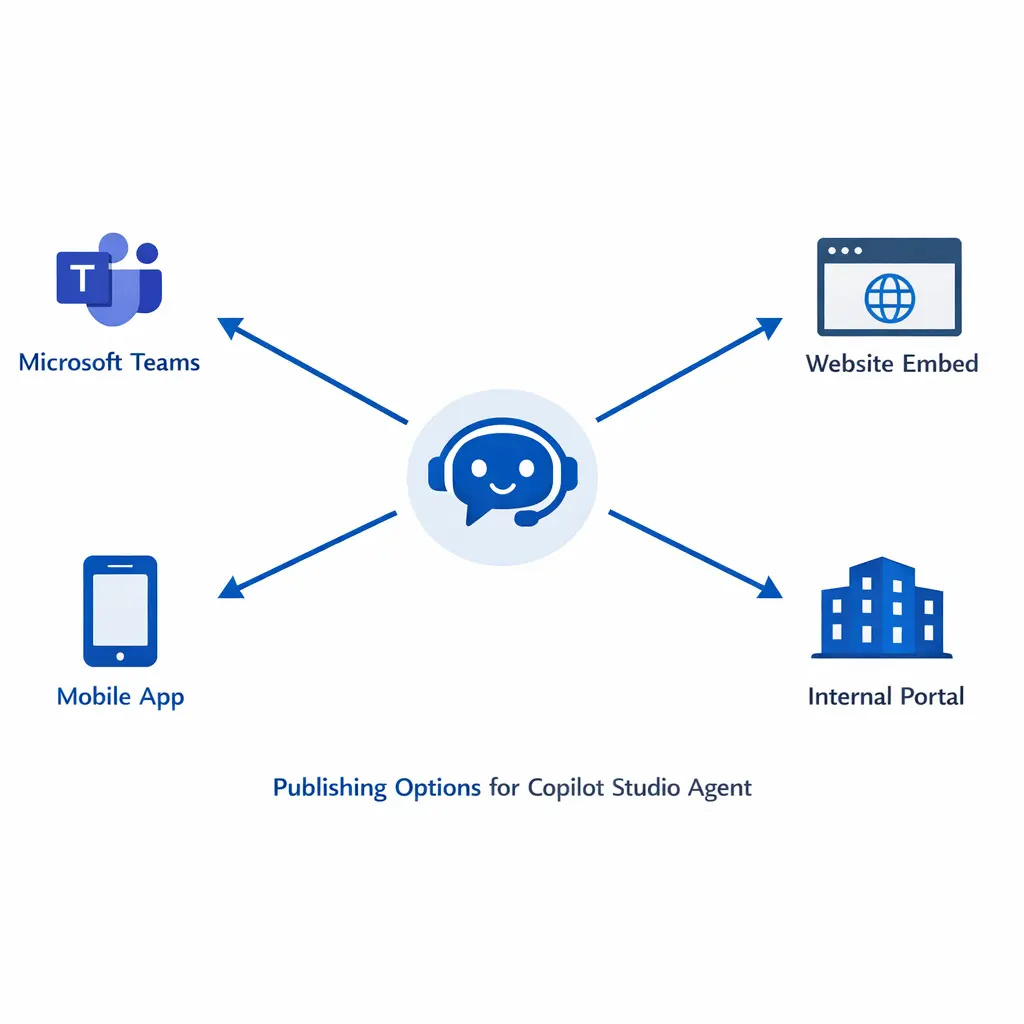
Step 6: Publish Your Agent and Monitor Performance
Once tested:
Publish → Deploy
You can deploy to:
- Microsoft Teams
- internal websites
- customer portals
- apps
After launch, monitor:
- top queries
- failed conversations
- escalation rates
- usage levels
The best AI agents improve over time.
The first version is the starting point, not the final product.
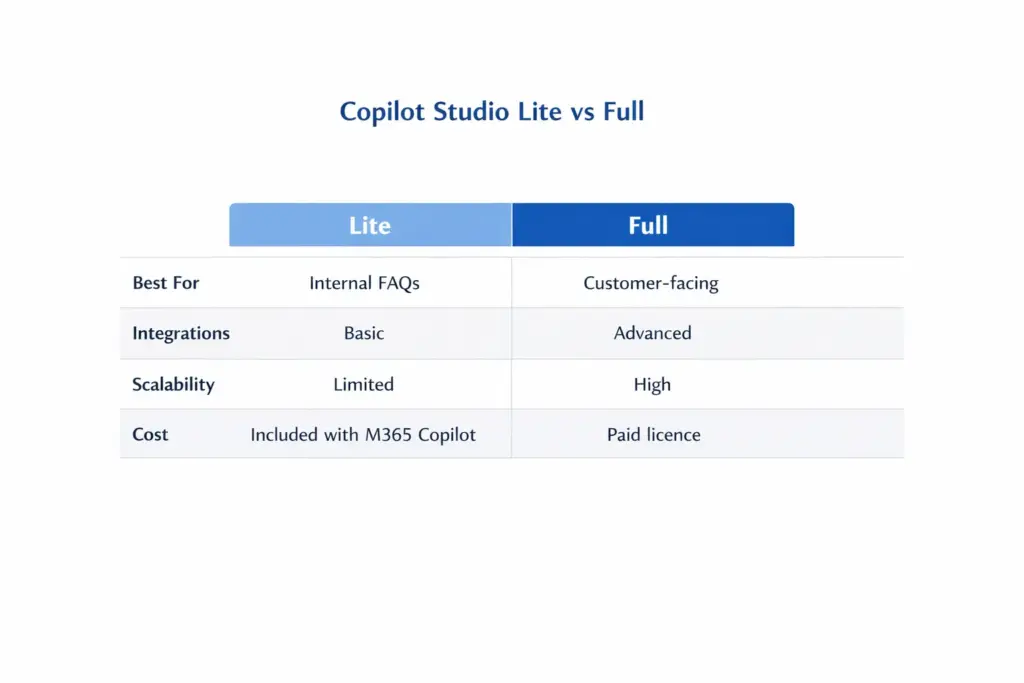
Copilot Studio Lite vs Full: Which Should You Choose?
This is one of the biggest questions businesses now ask.
Copilot Studio Lite
Lite is included with Microsoft 365 Copilot.
It is best for:
- internal FAQs
- simple helpdesk use cases
- onboarding support
Good if:
- you are just starting
- your use case is simple
- you mainly work inside Teams
Copilot Studio Full
Full is built for more advanced use cases.
It supports:
- external systems
- customer-facing agents
- more control over workflows
- advanced orchestration
Use Full if:
- you need integrations
- your use case affects customers
- you need scalability
For most businesses, Lite is a sensible starting point.
Common Mistakes to Avoid

A lot of businesses rush into AI agents and get poor results.
The most common mistakes are:
- trying to automate too much too soon
- using poor quality data
- skipping testing
- not defining ownership
AI agents work best when they solve one clear problem well.
The fastest wins usually come from:
- internal support
- FAQs
- approvals
- document access
Start there first.
Why Businesses Are Prioritising Copilot Studio
For Microsoft businesses, Microsoft Copilot Studio is attractive because it fits into tools teams already use.
It works naturally with:
- Microsoft Power Platform
- Microsoft Teams
- Microsoft SharePoint
- Microsoft Fabric
That means businesses can:
- automate support
- improve employee experience
- reduce manual admin
- create better access to information
without adding another disconnected tool.
Final Thoughts
Building an AI agent is no longer just for technical teams.
With Microsoft Copilot Studio, businesses can now build useful agents faster than ever.
The key is not starting with the technology.
It is starting with the right business problem.
The businesses getting value from AI agents today are not trying to do everything at once.
They are starting small, proving value quickly, and improving over time.
That is what makes AI practical.
Need Help Building an AI Agent That Actually Delivers Value?
Synapx helps businesses design, build, and scale AI agents using Microsoft tools.
From internal support agents to workflow automation, the right setup can save time, reduce pressure on teams, and improve service quickly.
If you want to move beyond AI experimentation, now is the right time to start.